Hello there,
Some of your might know that I’ve been putting some work in FluffOS v2019 lately, adding some long craven features to it (full UTF8 support, yay), and also, I want to make it easier to development and experiment with.
That’s why today I am posting the current steps to build and play with fluffos on OSX and Mingw64.
For OSX:
Thanks to github, fluffOS now has OSX CI that will check all commits, this is also where you want to look on how to build the driver if the information here is outdated:
So, checkout https://github.com/fluffos/fluffos/blob/master/.github/workflows/ci-osx.yml 8
Basically, in order to build FluffOS under OSX, you need to install https://brew.sh/ 7 first.
Then you would want to install all the libraries you need
$ brew install cmake pkg-config mysql pcre libevent openssl jemalloc
One caveat is that Homebrew don’t install openssl into the usual places, so you need extra ENV param when doing cmake
$ mkdir build
$ cd build
$ OPENSSL_ROOT_DIR="/usr/local/opt/openssl" cmake ..
$ make install
Find your OSX binary at build/bin !
For Windows (MSYS2/Mingw64):
So, Github Actions doesn’t come with MSYS2 by default yet, so we haven’t add an CI, keep an eye out though.
First, you need to install MSYS2, from offical website here 27 , pick X86_64 version if you are on 64 bit windows, i686 if you are on 32bit. (Note that it doesn’t matter what you compile into, FluffOS LPC VM is always 64bit! The only difference is that you can’t use more than 4G memory in 32bit.)
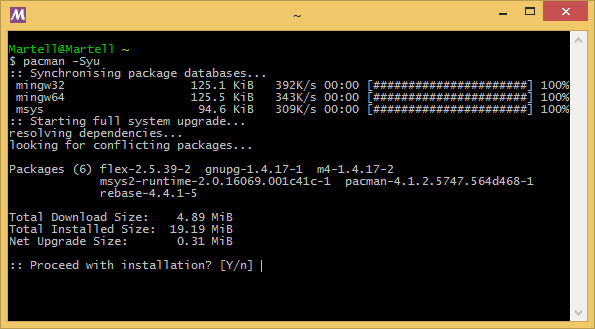
Next, you need to open msys2.exe and sync and update MSYS2 with pacman. Do
$ pacman -Syu
and you might need to close msys window and reopen, keep running that command until there is nothing to upgrade anymore.

Secondly, you want to install mingw64 devtoolchain, do this
$ pacman -S git mingw-w64-x86_64-toolchain mingw-w64-x86_64-cmake
$ pacman -S mingw-w64-x86_64-zlib mingw-w64-x86_64-libevent mingw-w64-x86_64-pcre mingw-w64-x86_64-icu mingw-w64-x86_64-openssl

$ pacman -S bison
Once this is over, remember to close MSYS2 window, find MINGW64.exe in the same directory and open that instead. Very Important!
Now, build things as usual!
$ mkdir build
$ cd build
$ cmake -G "MSYS Makefiles" -DPACKAGE_DB=OFF ..
$ make install
If you want PACKAGE_DB=ON , install additonal mysql package with
pacman -S mingw-w64-x86_64-libmariadbclient
Or if you want sqlite3
pacman -S mingw-w64-x86_64-sqlite3
That’s it!
Note
Remember both platform are experimental right now (For example, eval limit timer won’t trigger), especially on Windows, so report any bug you might have seen!
下面是中文版的编译流程 by andersgong
安装完msys2 64之后,运行msys2.exe,并且同步更新系统环境
pacman -Syu
中间可能好几次,根据提示,直接点右上角的X关闭窗口,然后再次打开继续更新,直到提示今日无事可做为止。
安装相关的编译工具
pacman -S git mingw-w64-x86_64-toolchain mingw-w64-x86_64-cmake
pacman -S mingw-w64-x86_64-zlib mingw-w64-x86_64-libevent mingw-w64-x86_64-pcre mingw-w64-x86_64-icu
pacman -S bison
pacman -S make
直接关掉msys2.exe
将mysql开发包解压缩到C盘根目录,结果应该如下:C:\MySql\mysql-connector-c-6.1.11-winx64
以管理员权限运行mingw64.exe
git clone/pull不用说了吧
mkdir build
cd build
cmake -G “MSYS Makefiles” -DPACKAGE_CRYPTO=OFF …
make install
生成的driver.exe在build\bin下面,同时依赖以下dll:
libevent-2-1-7.dll
libevent_core-2-1-7.dll
libevent_extra-2-1-7.dll
libevent_openssl-2-1-7.dll
libgcc_s_seh-1.dll
libmysql.dll
libpcre-1.dll
libssp-0.dll
libstdc+±6.dll
libwinpthread-1.dll
zlib1.dll
libjemalloc.dll
除了libmysql.dll在C:\MySql\mysql-connector-c-6.1.11-winx64\lib以外,别的全都在C:\msys64\mingw64\bin下面


